
 Yahoo Finance
 How to Spray-Paint Kitchen Cabinets
[table-of-contents] stripped
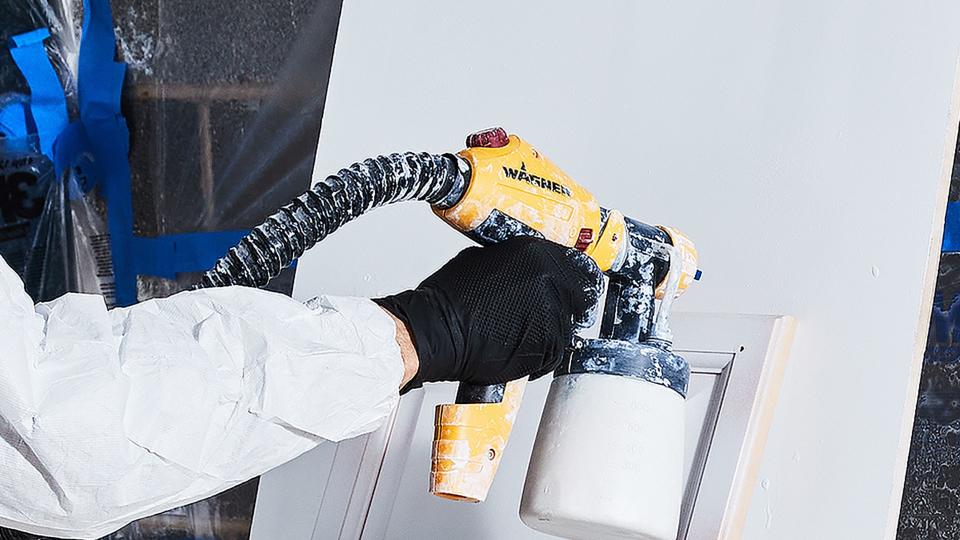
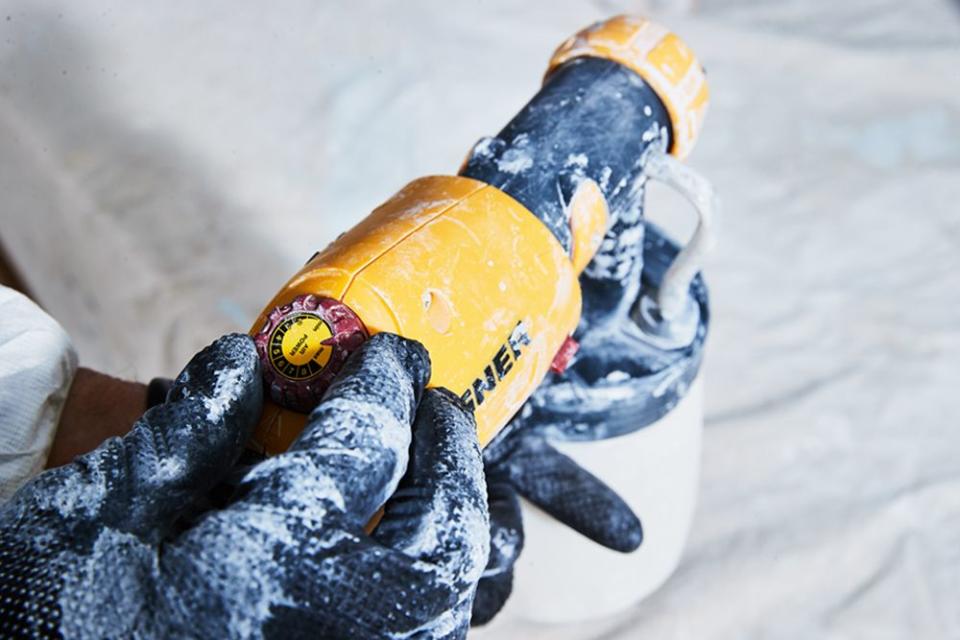
Spray-painting kitchen cabinets is a great way to refresh a kitchen on a tight budget. My wife and I opted to do this recently. I used a Wagner Flexio 5000 sprayer to paint the cabinet doors and drawer faces. Our budget refresh also included wall, ceiling, and trim painting, which I did with hand tools. I installed a tiled backsplash, performed electrical and plumbing repairs, installed new appliances and new light fixtures, plumbed in a new sink with a Moen faucet, and installed a garbage disposal. We also did the sorts of miscellaneous things that crop up during a job like this, such as rerouting telecom wires. I handled all that and built a new Formica laminate counter. But I hired a flooring contractor to install a thin-plank vinyl floor so that I could keep moving with the rest of the work.
What I report here is based on firsthand experience from a typical middle-class family that opted out of a glamorous kitchen remodel. For us, and our budget, a refresh was more sensible. I emphasize that my report is not based on digital sleight of hand, where it looks like I did the work but I really didn’t. Yes, I actually set up a spray booth in my basement and sprayed 23 kitchen cabinet doors and 18 drawer faces. I sprayed the sides of our kitchen island in place. Each door and drawer face received three applications of paint on the front, back, and edges—one coat of primer and two topcoats. Both the topcoat and primer were water-based urethane acrylic.
I carried out the paint job over the Christmas holiday break without major disruption, but this method should work for any time of year with minimal mess and fuss. My wife looks forward to some quiet time in the kitchen during that season, and it was important to us that she not be inconvenienced. Our kitchen remained in operation while I went about my work.
Since we have frameless cabinets, it was easy to remove the doors, leave the hinges in place, and paint the cabinet edges with a brush. If you have cabinets with face frames, I don’t see that as a big deal. You can either keep the kitchen in service while you paint those surfaces by hand, or take the kitchen out of service, tape and protect all surfaces, and then use the paint sprayer to prime and topcoat those surfaces.

Takeaway: Spray-painting kitchen cabinet doors and drawers is a big job but something you can do yourself. The tool that makes it possible is the Wagner Flexio 5000, a turbine-powered paint sprayer with an all-plastic paint gun. After a brief learning curve with it, you can achieve results that are nearly as good as a factory finish. And that’s remarkable, given that you’ll be painting doors and drawers that are used, not new. In our case, our cabinet doors and drawer faces had been in service for 24 years, and they had a lot of hard work behind them. They looked new when I was done. That’s due to the quality of finish you can achieve with the Flexio 5000 and using topnotch paint which, in my case, was Cabinet Coat and Stix Waterborne Bonding Primer. Both are coatings in Benjamin Moore’s Insl-X product line

My 7-Step Painting Process
Before we get into the finer points of painting cabinets, here is my seven-step process for removing, prepping, painting, and reinstalling kitchen cabinet doors and drawer faces.
Remove: In my case, each cabinet door was held in place with two hinges, two screws per hinge. Each drawer face was held in place by two screws and the knob screw. Remove the screws holding each door to its hinge and the screws holding each drawer face to the drawer box.
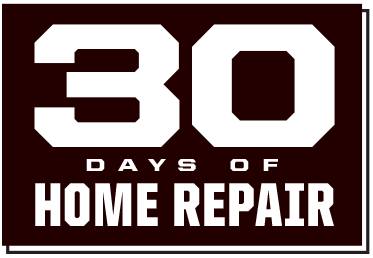
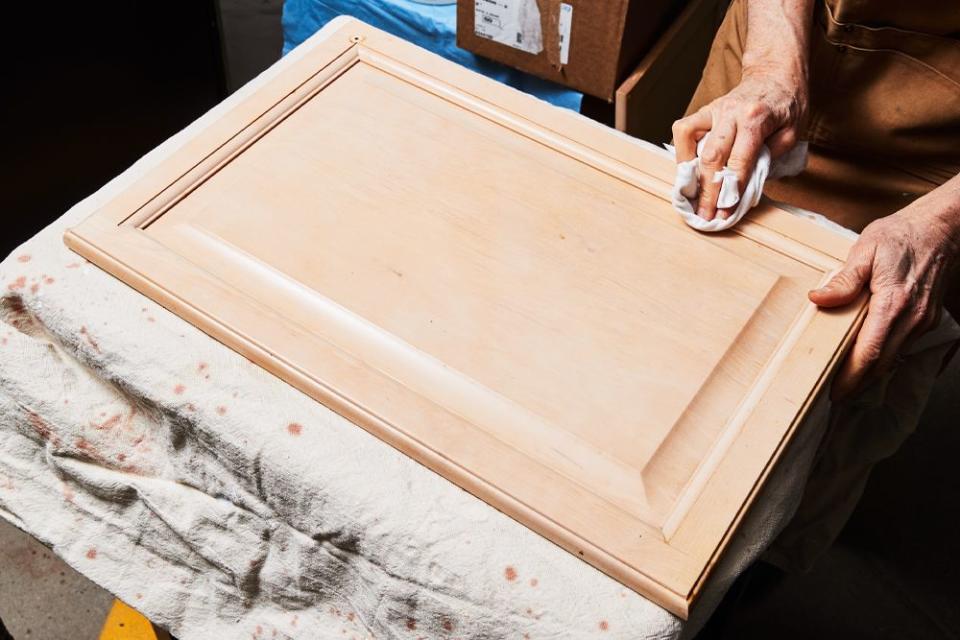
Trevor Raab Clean: Use a light application of a spray degreaser to clean the door fronts and drawer faces. Wipe them down with a clean, soft cloth. Next, wipe down the doors and drawer faces with a cloth moistened with nothing but water applied lightly with a spray bottle. Then wipe the doors and drawer fronts dry. Note: Use separate cloths for each step—cleaning, clean-water wipe-down, and drying.
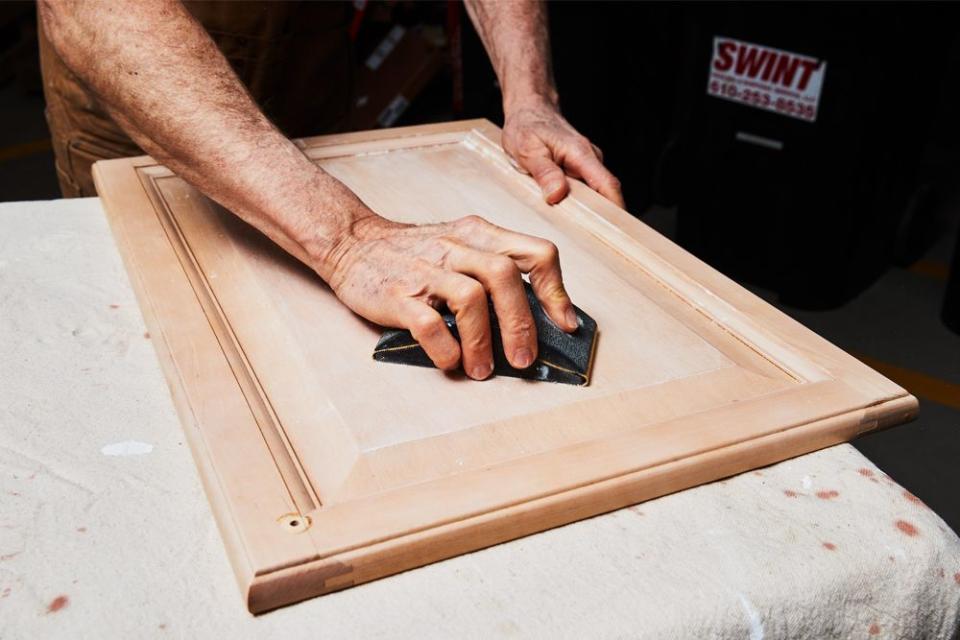
Trevor Raab Sand: De-gloss both sides of the doors and drawer faces using a hand sanding block and fine sandpaper. There is no specific grit recommendation that will work for all doors and drawer fronts. It depends on their level of gloss and what they are coated with. After experimenting with a range of grits and sanding methods, I settled on 320-grit paper and a hand sanding block. I found that a random-oscillating sander was too aggressive and made too big a mess. Just lightly de-gloss the front, back, and edges of each piece. Don’t sand through their finish; the area will show through the paint. Vacuum off sanding dust then wipe the surface clean with a moist cloth.
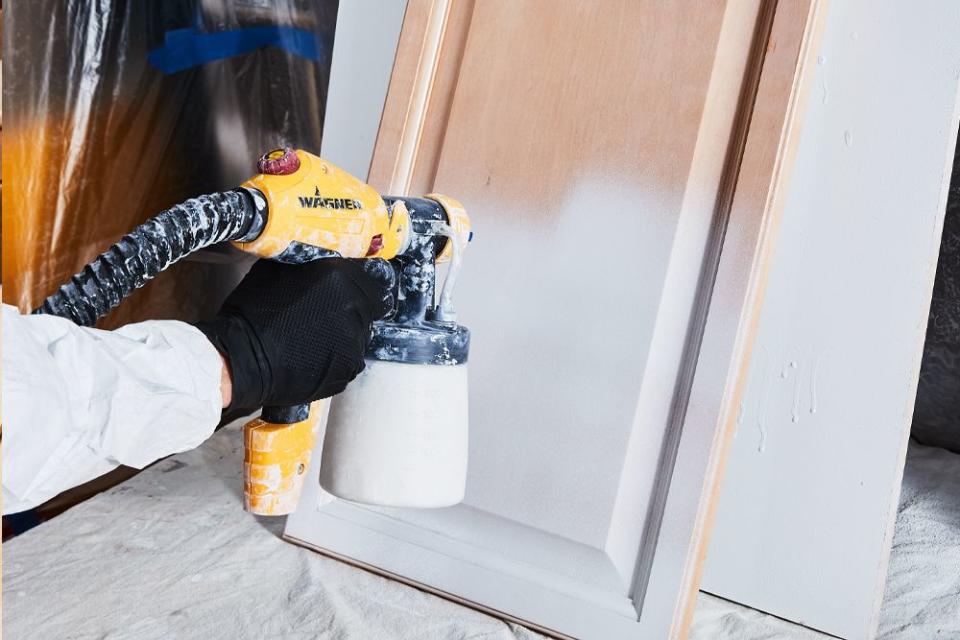
Trevor Raab Prime: After several trial-and-error applications, I settled on shooting the primer at full thickness but the topcoat thinned. Priming is simple. Lean the doors and drawer fronts in the spray booth against backstops. Position each drawer front and cabinet door so that its back is facing forward. That is, use the back surface as your trial surface to adjust your speed over the work surface, the distance from the surface, and gun settings. To spray primer at full thickness, dial up the pressure on the Flexio to full (or nearly full) power. Spray the back of each door and drawer face. Using the corner edge of the door or drawer face, pivot the part up on one corner and turn it around. Next, prime the front, the top edge, and the side edges of each piece. When the primer has dried, lay the doors and drawer edges down and make a quick pass on the bottom edge that was unpainted.
Trevor Raab Apply Topcoat: I thinned the topcoat to a ratio of 80 percent paint and 20 percent water. The topcoat is applied the same way as the primer. After the bottom edge that was primed has dried to the touch, shoot the thinned topcoat on the back of each door and drawer face, then turn the parts around and shoot the front face, top edges, and sides. When those surfaces have dried, lay the pieces down and shoot the bottom edge. Apply the second topcoat in exactly the same sequence: back, front, edges, bottom edge.
Reinstall: In the case of my frameless cabinets, while I was waiting for the doors and drawer fronts to dry, I spread tarps in the kitchen and hand-brushed two coats of full-thickness paint onto the cabinet edges. I used a very exacting trim brush to do this. It worked beautifully. When the cabinet edges, doors, and drawer faces were dry, I reinstalled the doors and drawer faces on the drawer boxes. After my trial-and-error phase was complete, I could remove the doors and drawer faces, prep and paint them in the early morning, and have them back in place by lunchtime. Doors and drawer faces that were prepped and primed in the late afternoon could be topcoated the next day, providing additional momentum. You need fast turnaround to keep the process moving forward.
Touch Up: Inevitably, I would find a door edge or the edge of a drawer face that hadn’t been fully sprayed. I touched these up with a trim brush. If you are careful to keep the brush on the door edge and don’t accidentally brush onto the face, you’ll never know it was touched up. If you do err, overlap the brush onto the door’s back surface, where it’s less visible.

How to Make a Paint Booth
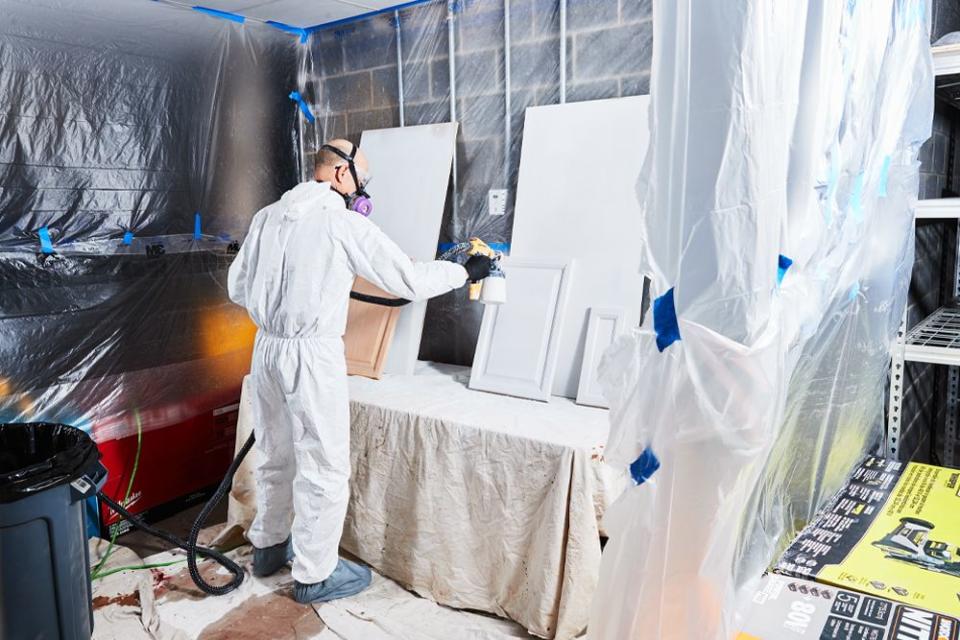
You need a paint booth to spray cabinet doors and drawer faces because spraying paint generates a lot of air movement, and that invariably raises dust that will stick to freshly painted surfaces. Also, you don’t want paint mist (known as overspray) to get loose anywhere in your house. Not only will it make a mess, but it can find its way into heating and cooling equipment and your refrigerator, which pulls in air from its surroundings.
To make my paint booth in the basement, I used a 3M hand masker—a tool that rolls out masking film and masking tape at the same time. I applied the film and tape to floor joists, pipes, air-conditioning ducts, and the house’s foundation wall. The film is folded and partially hangs down from the tape, and then you unfold the rest of the film. Repeat the process, gently taping the film to itself, to provide complete coverage floor to ceiling. The film is extremely thin and has a powerful static charge on it. Paint particles in the air and dust cling to the film. The film became so loaded with paint particles that I took it down and replaced it mid-job. If you don’t want to invest in a hand masker, or it’s inconvenient for your situation, have a helper assist you and tape the film to thin and lightweight lumber, and attach these to the wall and ceiling. You can also invest in a Zip Wall enclosure—a contractor-grade system of poles that forms an enclosure of plastic film.
Inside of the paint booth, I placed a plastic folding table that we use for family cookouts. I covered it with canvas painting tarps. On top of the table, I leaned two medium-density fiberboard (MDF) panels at a steep angle against the wall and leaned the cabinet doors and drawer faces against these. I found that when I leaned the doors and drawer faces against the film on the foundation wall, I damaged the film from both the force of the paint striking the film and from moving the parts around. The MDF panels form a protective backdrop.

Tips for a Successful Spray Job
There are a lot of tips that go into a successful spray job. Here’s what I learned over the course of painting my cabinets.
REMEMBER, SAFETY FIRST
Invest in a cartridge respirator to spray paint. Don’t use a dust mask; it won’t provide adequate protection from paint mist.
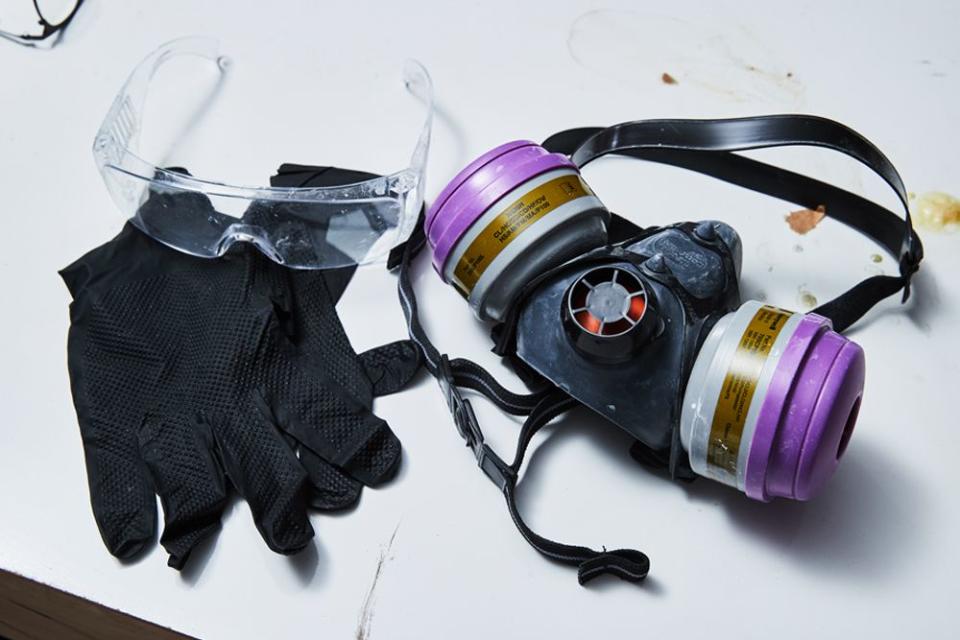
PROTECT YOUR EYES AND HANDS
I have a pair of beat-up reading glasses that I use for painting, and I protect them by wearing goggles over them. I wear disposable nitrile gloves to keep paint off my hands.
REDUCE AIR MOVEMENT
The sprayer turbine moves air, so you want to position it outside the spray booth where it will take in clean air—not air with paint mist in it.
ADJUST THE VARIABLES
To successfully spray-paint, you need to adjust several variables:
Volume: This is the paint volume the gun will move. A dial near the trigger adjusts this.
Pressure: This is the air pressure supplied by the turbine. The thicker the paint, the more pressure you need to move it. The thinner the paint, the less pressure. Adjust the dial on the back of the gun.
Distance: This is the distance between the gun’s tip and the workpiece. Monitor your distance over the surface to avoid leaving too much paint and hitting the work piece so hard that the paint will run.
Speed: This is how quickly you move the gun over the workpiece. Slower speeds apply more paint; faster speeds result in less paint and a thinner coat.
Wagner supplies a test target sheet with the Flexio that is somewhat helpful if you’ve never sprayed paint before. Try shooting at the target to get some sense of these variables. But keep in mind that doors and drawer faces are not paper, so your results will be different on them than the target sheet. Also, your results may vary slightly within the same day, as temperature, air moisture, and even the day’s atmospheric pressure shifts with changing weather. Settings that worked a few hours earlier or the previous day may not work on the next round.
LOOK AT THE PAINT PATTERN
Look at the pattern that the gun is producing, especially its leading edge, which should be a reasonably clean line. A spray gun produces an oval pattern—the cleaner the oval, the better. If you’re seeing a lot of splatter or an irregularly shaped pattern, you’re either too close to the surface, you’re moving too slowly over it, or you have the pressure turned too high. Moving too quickly over the surface shows as a neat but thin pattern.
WATCH THE SHEEN LEVEL AS YOU SPRAY
The paint’s sheen is your best indicator of whether you are spraying too much paint. Spray-painted parts should look wet but not like they have been dipped in paint. The moment the part looks like it’s been dipped, you’ve got too much paint, which will cause it to run. Adjust the variables discussed above to prevent runs or reduce their severity.
STOP RUNS IMMEDIATELY
It’s nearly inevitable that you will produce a run in the paint. Remember this cardinal rule: If there is some flaw in your painted surface, applying more paint will rarely solve the problem. Adjust one or more variables (pressure, trigger travel, distance, and speed over the surface); don’t just keep spraying paint.
Also, when you see a run form, stop spraying, and turn the part 180 degrees. This causes the drip to flow back in the opposite direction, arresting its travel.
When the part is just dry enough to handle, begin wet-sanding out the run. Use the spray bottle that you use to clean the paint gun, and a piece of 1,000-grit abrasive paper. Mist the run with water, then work over it with the sandpaper in a circular motion. Wipe the part clean as soon as the run has been removed and spray the next coat.
APPLY ENOUGH COATS
I said earlier that I applied two topcoats to each drawer face and door, but some doors and drawers see more use than others. In the case of those surfaces, I would apply more topcoat by applying a bit more paint on the front of the most-used parts, while being careful to not produce a run.

LABEL PARTS
To make sure doors and drawer faces go back where they came from, number or letter the doors using a ballpoint pen. Write on the door face below the hinge hole and cover the information with painter’s tape. This is important if you remove all the doors (and drawer faces) at one time and paint them all in one long painting session. In my case, it wasn’t as important because I removed the doors in batches and the door’s size and knob location told me where it went back. If you start painting and remember that you haven’t marked the part or taped over the mark, no big deal. Stop, label the part, tape over the information, and resume painting. For my drawer faces, location was important because all were the same size, and the central knob location would not help me match the face with the drawer box it came from. To keep them straight, I wrote on the back of the drawer face and taped over it with a piece of painter’s tape.
WORK EFFICIENTLY
Make your paint booth as large as possible and provide a large work surface inside the booth so you can stand as many doors and drawer faces as is practical. The more parts you can paint in a session, the more efficient you’ll be.
CUT DRYING TIME
To cut my turnaround time, I placed a small electric heater on top of a heavy wooden toolbox inside my booth (a small, gentle heater is all you need for this step). The wet film on parts sprayed with water-based paint begins to coalesce very quickly. Within minutes of painting, I directed the heater at the parts about three or four feet away. I found that the heater’s 1,300-watt setting and maximum fan speed were ideal. Your results will vary depending on the paint you use, where you are painting, air temperature and humidity, and your heater.
FIND THE RIGHT PAINT CONSISTENCY
It’s difficult to decide how much to thin the paint. Because primer is usually thinner than the topcoat, I sprayed the primer on without thinning it with water. This seemed to be about the maximum viscosity that the Flexio was capable of shooting. For the topcoat, I found the 80:20 ratio delivered a coat that was easy to spray, applied smoothly, and dried rapidly, permitting rapid recoat.

Cleaning the Sprayer
The Flexio 5000 is a well-engineered piece of equipment, one of the best I’ve seen in 35 years working at Popular Mechanics. It’s built and priced for the DIY painter, but it delivers pro-level results—if you keep it clean. And cleaning was tough in my case. The spray booth was downstairs, the kitchen sink was occupied, and there isn’t a utility sink anywhere in the house. Here’s what I did: I used a wash bucket, a plastic cup, a spray bottle with clear water in it, and some Simple Green cleaner. I washed the gun out immediately after shooting the primer, but not between topcoats. So, I primed, washed out the gun, shot the first topcoat, put the gun aside and just wiped off the spray tip with a clean moist cloth, then shot the second topcoat, and cleaned out the gun before priming the next batch of doors and drawer faces.
To clean the gun without a utility sink, I used one bucket that was large enough so that I could detach the paint nozzle assembly and paint cup from the gun and drop the gun into the bucket filled with water. I took the parts of the nozzle assembly and dropped them into a plastic cup with a strong solution of Simple Green cleaner and water. While the parts were soaking, I emptied the paint cup, wiped it out, and used a plastic spray bottle to blast its inside clean. I then wiped the inside of the paint cup clean using a piece of blue shop towel. Next, I fished the gun out of the cleaning bucket and used the spray bottle and the brush that comes with the gun (and a separate cleaning brush that I supplied) to spray, scrub, and wipe the spray gun until it was clean. Finally, I fished the nozzle assembly out of the Simple Green solution and gently scrubbed, sprayed, and wiped the parts until they were immaculate. When I was ready to paint again, I reassembled everything. Important: Primer sticks more tenaciously to plastic than the topcoat does. Always clean the gun immediately after priming.
You Might Also Like
