
 Yahoo Finance
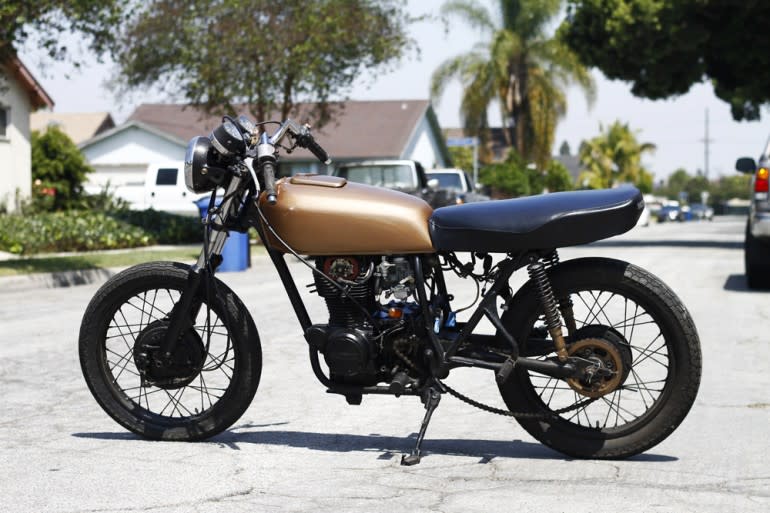
Mistakes and Polishing - Hipster Bike Update 2
Some days are better than others, and those some days are spent either in the garage or on the bike. We recently picked up a 1976 Honda 360T from a music video producer last month and have been spending a lot of time in the garage. We’ve since learned the former ‘builders” (using the term very loosely) had made more than a few mistakes in building this little faux-cafe bike. Intended to be used by my fiancée as her first bike, it needs to be reliable, safe and stylish. Here’s a rundown of the improvements and mistakes we’ve made so far.
READ MORE: I Bought a Hipster Bike | RideApart
No Fuel = Big Problem
First, we need to answer our trivia question at the end of the first installment: Why wasn't gas coming out of the gas tank?
To answer some of the commenters: NO! It’s not a vacuum-operated petcock!
We did a test ride when we fist looked at the bike. It had been warmed up and was hot and ready to ride when we pulled up (yes, I know I didn’t follow my own advice here).
With pop-on air cleaners in lieu of an air box, it’s probably pulling in too much air. Add that with a straight pipe, it’s a double whammy that often results in an ill running motorcycle.

We kicked it over and it revved to life immediately, idled for a moment, and then died with a faint pop from the exhaust. Another kick and we took off up the road. It felt great while accelerating—it was tuned perfectly with no flat-spot in the RPM range that's usually due to poor tuning and the pop-on-air-cleaner-no-muffler combo. We were pleasantly surprised and thought that the person who built it knew what they were doing.
We were sorely mistaken.
Yes, the quick and faint pop should have been a sign, but we felt it was something fixable. Maybe the carbs aren't perfectly synced or the jets have a little dirt in them. Whatever it was, I figured it could be fixed.
READ MORE: Craigslist Project Bike: How Should We Build It? | RideApart
Once we returned home, we kicked the bike over and took off up the street for a quick ride around the block, a celebratory action I’ve performed many times. The fear of making a bad investment usually blows past you with the same motion of the wind through your hair as you take that first lap around the block. Of course, the bike has to be able to make it around said block.
We made it to the first stop sign and it died. We got it running again, but it wouldn’t accelerate—meaning, as we twisted the throttle, nothing happened. It was obviously struggling for fuel.

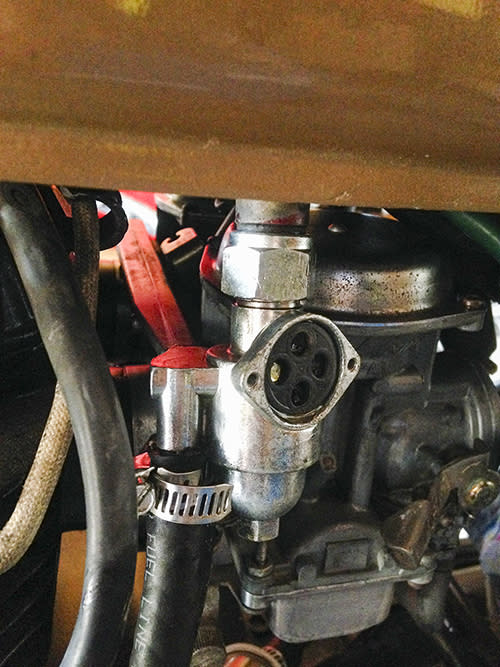
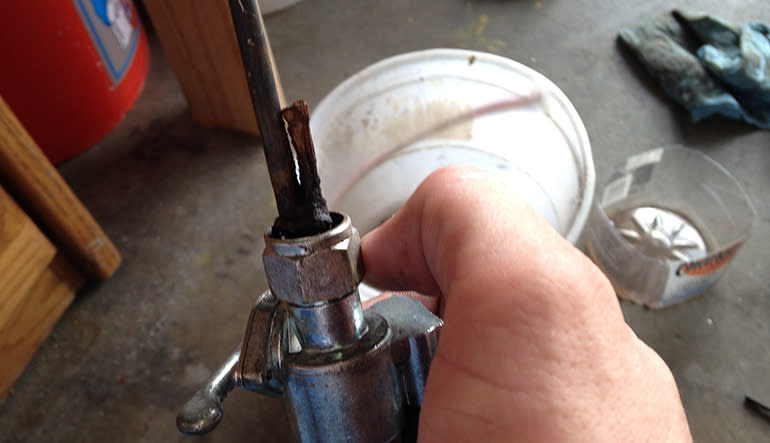
We thought to check the bowls of the carbs for dirt that could be clogging the jets. As we pulled them off and began examining, we noticed we forgot to turn off the petcock, even though no fuel was coming out. It was jammed full of brown, clumpy rust that resembled clay mud.
It was blocking the petcock and therefore leaning out the mixture. Just by happenstance, it appeared maybe the fully warmed bike was able to rrun perfectly tuned due to the accidental restriction of fuel from the petcock? Never the less, it needed to be fixed.
We went ahead and cleaned out the little bit of rust that was packed into the bowls, but the jets were luckily clean.
The seller mentioned the bike was shipped from Tennessee to California for re-shoots of the music video it was originally purchased for. My best guess would be that the tank was drained (as some transportation companies insist on no fuel.) The tank was probably left empty as re-shoots were rescheduled many times and then eventually canceled. This eventually introduced rust into the tank. Then, by adding fuel probably hours before we arrived, that rust turned to mud.
We washed out the tank with water and cleaner (we’d stolen a little from our tank sealer kit we used on the Craigslist project bike). We let it sit in the sun for half a day, then blew it out with an air hose and finally a bottle of Heet water-remover with fuel. We did a better job of drying out our Craigslist project bike tank, by duct taping a shop-vac in reverse on high for 20 minutes.

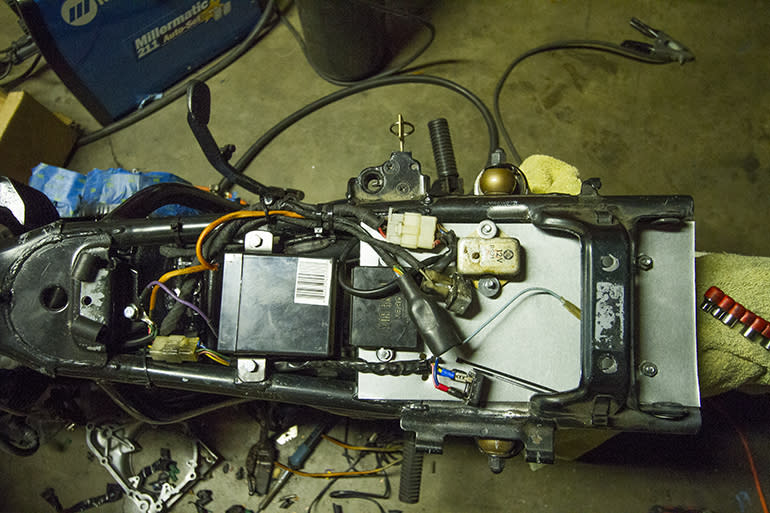
Battery
For kick-start and most older small-CC motorcycles, only the taillight and horn are powered directly from the battery. The headlight is powered by the charging system—this is a safety issue. Let's say you're at a stop light in the middle of nowhere, at night and you stall, the taillight will remain bright, keeping you from getting rear ended.
So, for our 360 with no electric starter, we only needed a few amps. We went to our local battery shop and picked out a compact powersports battery. Dry, sealed and only 18 bucks, it was perfect—we can mount it on its side and under the seat while keeping the opening in the frame free of clutter.

We made our own battery box from angle iron we picked up at McMaster-Carr.
Something caught our attention when we started to clean up the wiring. The ground cable was made up of different color speaker wires (um, that’s odd.) We started untangling the wires to find what we were anticipating. The wires were simply twisted together and then covered in tape (damn it!) That doesn’t worry us as now it’s fixed, but it causes us to wonder what other stupid mistakes did they make?
Exhaust
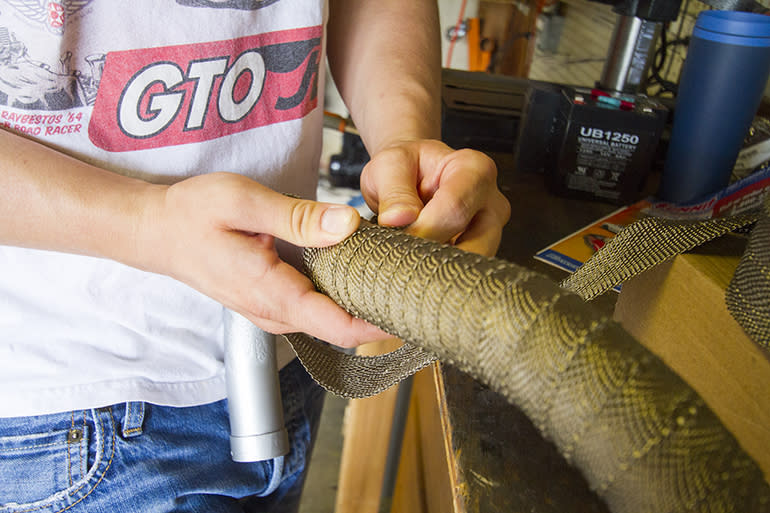
You know Summit Racing? The catalog mailer every gear head has beside the toilet? They have a motorcycle-parts division named Power Sports Place. Setup like Summit, they feature a bunch of universal performance parts along with brakes, cables, gaskets, etc. We picked up 100ft of Volcano exhaust wrap, to eventually be used on our other projects.
Summit Racing $74.97/100ft: Volcano exhaust wrap
Summit Racing $24.97/25ft: Volcano exhaust wrap (Probably only need 25 feet $24.97)
The exhaust pipes were pitted, so we first removed the rust with a wire brush and then coasted the pipes inside and out with Eastwood Hi-Temp Internal Exhaust Coating. This will cut down on any rust building up underneath the pipes. Exhaust wrap can hold in moisture, so we don’t want the exhaust to rust in a few years, especially since it only took us a minute to coat the pipes in paint.

Eastwood Hi-Temp Internal Exhaust Coating
$20 for the coating.
Biltwell was kind enough to help us out with a handful of parts for both project bikes. First is the universal mini-muffler. We need back pressure and the bike is frankly too loud. The muffler was small, so we mounted it as far forward as possible. This will hopefully cause some turbulence in the exhaust pressure and hopefully create a nice sound. We’ll have a sound clip of before and after in our next installment.
The muffler only needs a 1/4-inch bolt and washer (not included). We simply drilled a hole in the back of the pipe and used a stick to push the muffler in there just enough to bolt it in. If the muffler isn’t giving enough back pressure, we can use a large fender washer, bend it, and bolt it inside the pipe as well.

Biltwell - $19.95: Canon Mini Muffler
Once we have the sound we want, we’ll then start playing with the air cleaners until it’s perfect. Adding a restriction like duct tape to the air cleaners will let us know if we need to do a different intake and/or re-jet the carbs.
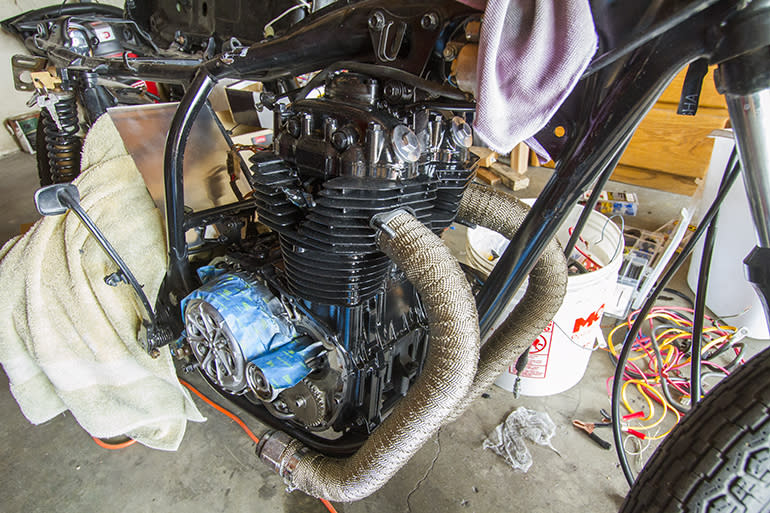
Engine
It was comical when we found what appeared to be a Mud Dauber nest inside the fins of the engine. For those in New York or LA, allow me to explain what the hell that is: It's a small, long, slender-shaped nest made up of dirt. There were three of those perfectly placed inside the top three fins on the engine—it made for a clear example of the bike’s former, rough life.
Immediately after getting the bike home, we gave the bike a hard wash using Simple Green cleaner and a wheel brush, avoiding the gas tank. This would show any weak paint spots and give the bike a healthy cleaning, which would hopefully unveil any problems.
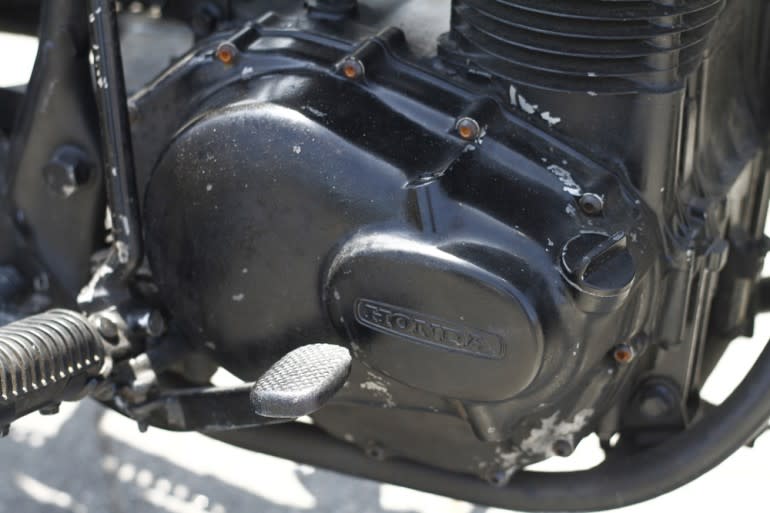
Paint on the engine was chipped in many areas after our wash. We took steel brushes and scotch bright pads and gave the engine a quick scuff. We then laid on some Dupli-Color gloss black engine paint. Luckily, because the engine was spray-painted black before, it didn’t need an intense prep or primer. If you missed any spots, they wouldn’t show up that easily.
Polishing
I’ve seen master mechanics make mistakes... and because I’m not a master, I make more. One careless thing I did was removing the two side engine covers to have them polished and to fix an oil leak. But once I removed the covers, I found it was hard to find replacement gaskets (something I should have done first). I may have found a retailer after many phone calls.
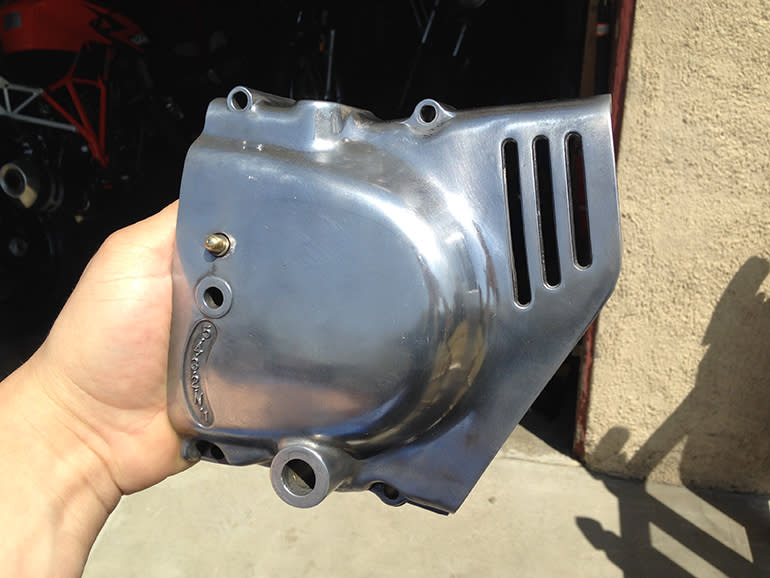
My current favorite tool in my garage is a Delta 6-inch bench grinder with a fine wire wheel brush on the left and a Harbor Freight “Cutting” polisher on the right. With the left and right engine cover and sprocket cover, we kill the paint with the wire brush, wet sanded it by hand, then polish it with the polishing wheel. The final product will have a mixture of polished pieces on the black engine. Not sure if we’ll polish the fins with the engine in the frame, but we’ll see how it looks assembled. Now, the question remains, should we attempt to clear coat the polished pieces in anyway? Suggestions? Comment below.
The guy at the swap meet said it would fit… there goes $8…
Next Steps
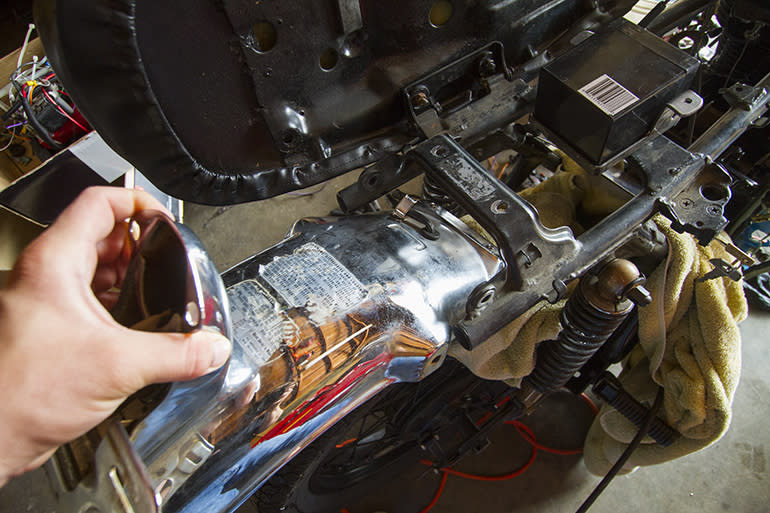
We now need to clean and repaint the front suspension and also decide on a tail section. We’re debating between a rear fender (I picked one up at the swap meet. It claimed to fit our 360, but it was the wrong size). The other, cafe option is a loop. We’ve searched for a local pipe bender, but it seems Dime City Cycles’ kits or loops are the best option. Most places that can perform a tight, 180-degree bend, will do it for $60-$80, not including the pipe. Dime City's is the best option.
At the moment it comes down to Saddlemen seats, who says they can track us down a replacement seat through one of its retailers.
Dime City Cycles: $70 for just the loop

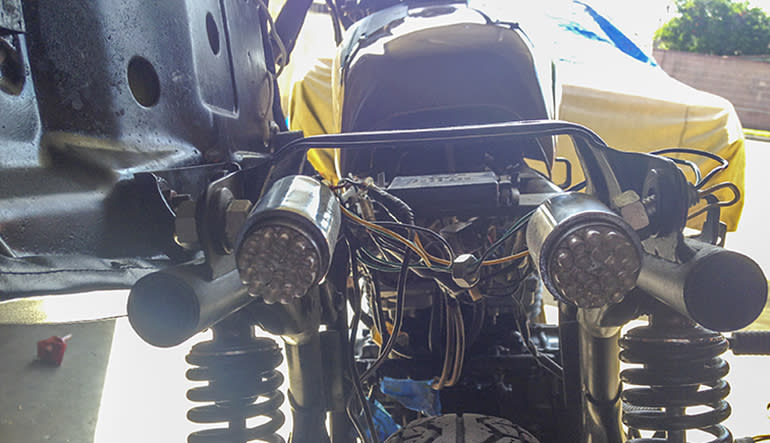
The original 360T has a great looking fiberglass tail section along with a chrome rear fender. I personally like the tail section, but it comes to finding one in decent shape. Then, we need to find the hardware for the rear taillight. We’d like to have a decent taillight that’s bright and mounted high for safety reasons. The pop-in, terribly small taillights that were hidden under the seat had to go (see picture above)!
Biltwell sent us a box of goodies that included its Moto handlebars, which will drastically change the look and feel of the Honda.
We’ll keep you posted on the next steps, and hopefully we’ll have this bike on the road in the next few weeks. We also need to make room for a very big Kawasaki project...
READ MORE: 12 Tips For Buying a Used Motorcycle | RideApart

Follow RideApart on Facebook and Twitter, along with @RideApart on Instagram.
