
 Yahoo Finance
 Five fatal photo errors (and how to avoid them)

Instantly improve your photography with these tips from Getaway photographer, Teagan Cunniffe.
1. Skew horizon lines

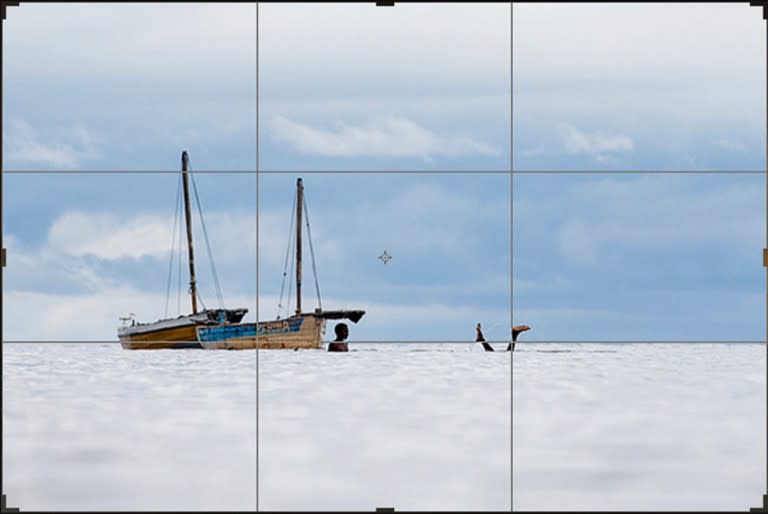
A photo with a slanted horizon immediately feels unbalanced to the viewer, an annoying itch that tickles the mind and implies the photo was taken carelessly (such as image 1B). It’s a simple fix: before you photograph, switch on your ‘grid’ overlay and line up the horizon with one of the horizontal lines running across your camera LCD or phone screen. You can also use the spirit level on your tripod to get your camera into the perfect position. However, skew images can happen, and luckily they can be fixed in post-production. Crop and straighten your image until the horizon line is parallel to the edges of the frame (image 1A). It’s better to get it right from the start ‒ preparing the camera before you press the shutter means you don’t have to crop your image and lose details around the edges of your frame.
2. Unfocused eyes

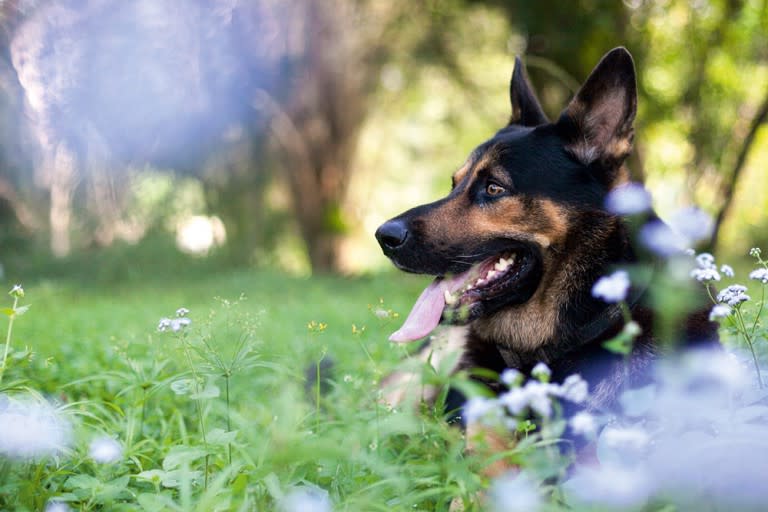
Making sure the eyes of your subject ‒ animal or human ‒ are in focus is essential when taking portraits. Use single point Auto-Focus (AF) mode and line up your subject’s eyes with one chosen point of focus. If you are using a shallow depth of field (f/4 and wider), your area of acceptable sharpness is limited and you need to take extra care to get the details you want in focus. For example, in image 2B the focus falls on the dog’s shoulder instead of its eyes. If your subject has turned slightly away, then make sure your focus is on the iris of the eye closest to you (image 2A).
3. Poor compositions

The quickest way to achieve a pleasing balance and composition is by using the rule of thirds (found by switching on the grid overlay seen in image 1A) and placing important elements either on the lines themselves or the points at which they intersect. In image 3B the photographer would have a more striking image if the windmill weren’t so boringly dead centre in the frame. Rather, the windmill should have been placed on a point of intersection, such as in the bottom left third of the photograph. More sky and mountain could have been included, creating a sense of the environment.

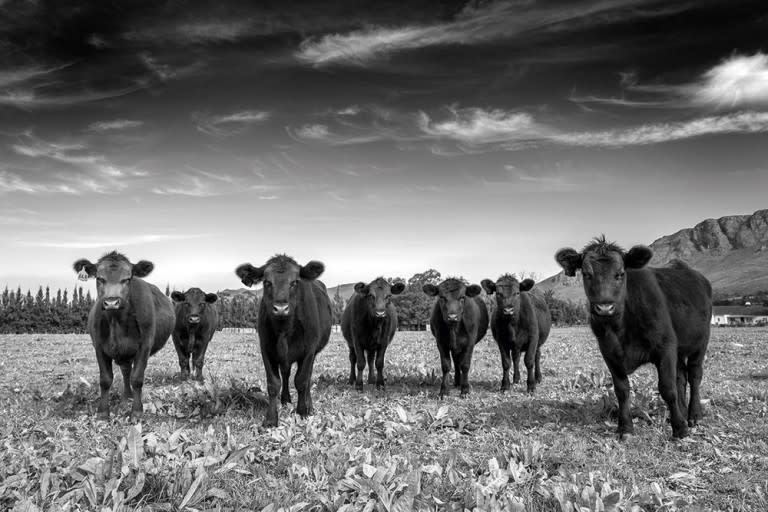
Look for lines that draw your eye into the image (called leading lines) and arrange them so they travel towards a point of interest, as in image 3A. Look out for symmetry and pattern in everything, from the buildings around you to the shapes of clouds above the landscape, such as the photographer found in the row of cows in 3C.
4. Boring perspectives

Shooting from the same height becomes dull for both you and the viewer. Change up your scene by getting higher or lower than your subject or finding a unique angle. Image 4A could have been a lot better if, instead of shooting the scene from a straight-on angle, the photographer had walked among the flowers and crouched down, shooting upwards and framing the flowers against each other, as in image 4B.

In general, looking down on your subject creates a feeling of inferiority whereas looking up elicits a feeling of awe. In image 4C, the photographer gets it right by moving to a lower vantage point and shooting the dhow from the water line, giving it an imposing feel and highlighting the shape of the vessel.

5. No clear subject matter

What are you photographing? What draws you to photograph this scene in particular? These are questions to keep in mind when framing and composing an image. If you don’t have a clear idea of what your subject is, then those who view it will have even less understanding. Take note of the foreground and background of your subject. Decide what you like about your subject (in image 5B, the ripples of sand and contrasting blue of the sky) and what is unnecessary (like the plants), and remove the clutter by waiting until your subject moves into a better position, or by changing your own position and perspective (image 5A).

Also read: More photo tips from Getaway magazine
This article first appeared in the August 2015 issue of Getaway magazine.

This article, Five fatal photo errors (and how to avoid them), was originally posted on the Getaway Blog by Teagan Cunniffe.
Related Articles
